Halftone Rendering in 3DSMAX
Some weeks ago there was a reddit thread about using a pseudo-halftone-shader in 3DSMAX. The solution there was a little more complex than what i thought it should be, so i played around and quickly ended up with something similar:
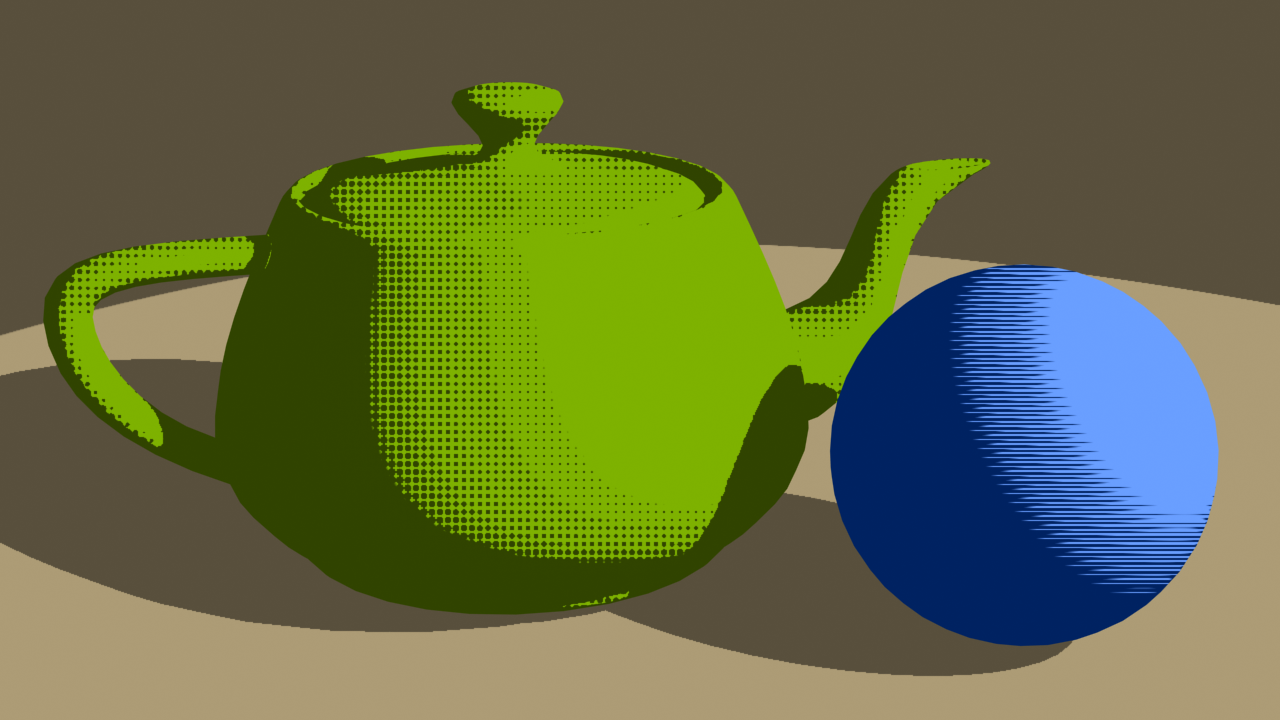
This look can be archived quite easily, you don't even need textures or special renderers for it, the standard scanline renderer from 3dsmax is good enough.

Map #1 Fallof
We start with a falloff map, which gives us a black and white version of the light on the material.

Make sure to set it on Shadow/Light
Halftone Dots
Then we need a base for our halftone dots. This is a simple gradient ramp map with some funky settings.
As dots are round, we will use the Gradient Type "Radial".
The dots will not adjust to the objects, but will be projected straight from the camera. As such set the coordinates to "Environ" and the mapping to "Screen". Then adjust the tiling to fit the apsect ratio of your final image resolution and the size of the dots. For 1080p, which is an aspect ratio of 16:9, i went the easy way and set the tiling to 160x90.

Map #2 Gradient Ramp for threshold
The next map is a gradient ramp, which combines those two maps and transform the resulting grayscale map to a straight black and white. We are using the values from the falloff map, hence set the gradient type to "mapped" and the source map to the falloff.
Next rightclick the middle gradient point and edit the properties. Here you can feed a map only to this one point and that's where we put the halftone dots map in.

Finally the map needs to be hard-cut to black and white. Open the output tab and enable the color map. Add two points to the map and arrange them something like this:

Now we have the basic halftone dot shader. All we need is some color.
Map #12 Gradient Ramp for Color
This is the easiest and most creative. Create another color ramp and set it to mapped. Add the previous gradient as a source and now select two nice colors for your halftone, kinda like this:

Halftone material
Finally the material to apply onto the object is a basic standard shader. Feed the color map into the diffuse and set Self-Illumation to 100%, as we don't want any "real light" to hit our material.

This concludes this tutorial.
You can exchange the halftone dots for whatever you want, as long as it has some gray tones in it. Also you don't have to duplicate the whole shader tree if you need another shader with a different color. Just feed in the gradient ramp for threshold into a new gradient ramp.
Have fun!